


The betitted and the beheader.
QUEST LOG #19: DARK MESSIAH OF MIGHT AND MAGIC (PART 1)

Spoilers ahead for this game, perhaps avoid everything after the first paragraph if do intend to play it. If you’re not bothered, by all means read on! Also, I wrote this one up a good few months ago, so no mention of the most recent Arkane news - although a little on Dishonoured can be found here:

Dark Messiah of Might and Magic is a first-person action role-playing game released in 2006 and is Arkane Studio’s second game, coming out four years after their inaugural title Arx Fatalis. If you are familiar with their first game, you can clearly see the resemblance in the titles. Dark Messiah was due to be a sequel to their original release, but its poor commercial performance meant that they struggled to find a publisher, despite it being very well reviewed. Eventually they were approached by Ubisoft, and the links to Arx Fatalis were cut in favour of the Might and Magic series, although the connection to that universe seem rather tenuous - I am only vaguely familiar with the Might and Magic games however, so there might be more than meets the eye. The setting is unimportant here anyway, as the story is self-contained.
You play as a combat mage in training named Sareth, and it’s your job to find an artefact. There is a lot more to the story than that, but it isn’t the story that makes this such a compelling game, although the narrative is pretty decent. On first playing, one might be put off by some of the slightly stilted voice acting or the awkward character interactions (the half-naked succubus type character seems to have been included just to get horny folk to purchase the game), but if you can get past this, which really only impacts a very small portion of the runtime, you’ll likely have a rather fun experience. That may sound like limited praise, but a fun game isn’t something to be sniffed at. There are frustrations aplenty, and difficulties along the way, with some rather strange mechanics and oddities associated with the Source engine (you’ll hear one of the Half Life sound effect when saving, which is very out of place), but once you’re familiar with the gameplay and you’re used to the quirks, the combat will have you hooked, and you’ll be gleefully kicking hapless creatures off ledges, impaling guards onto conveniently placed spike walls, and pinning mages with perfectly shot arrows. Physical combat isn’t the extent of what the game has to offer either – far from it. As a role-playing game, you’ll be given freedom to choose what skills you’d like to invest in, and while the skill tree is a little on the limited side, it does allow for a decent amount of customisation. The tree is split into melee combat, magic, and miscellaneous. The first two are rather self-explanatory, but the third avenue for point spending is focused more on skills that would fall under the remit of a traditional rogue – those being stealth and stealing. There are choices in the progression of the story too, and general navigation of the levels is quite compelling, as is the beautifully designed world you’ll explore.

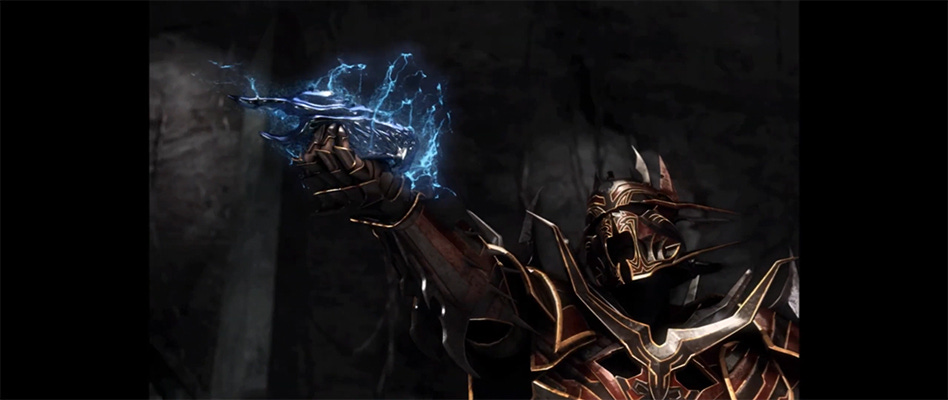
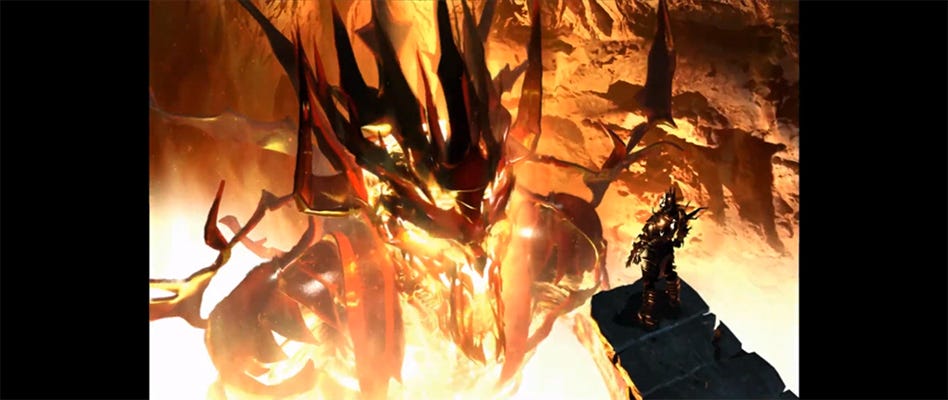
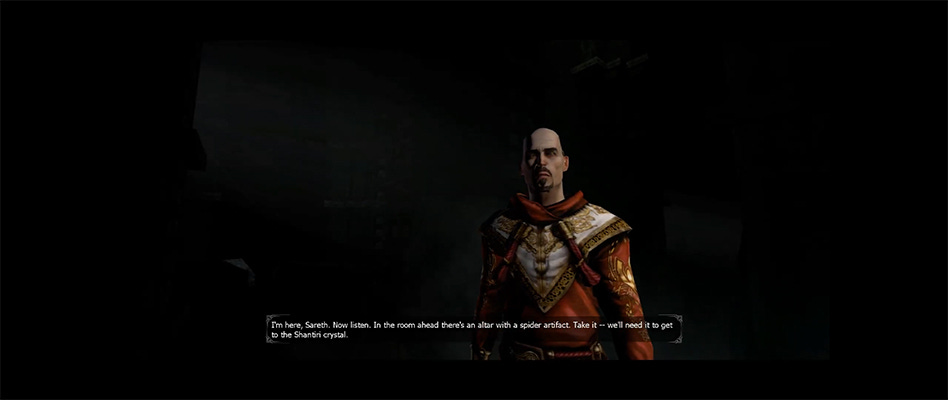
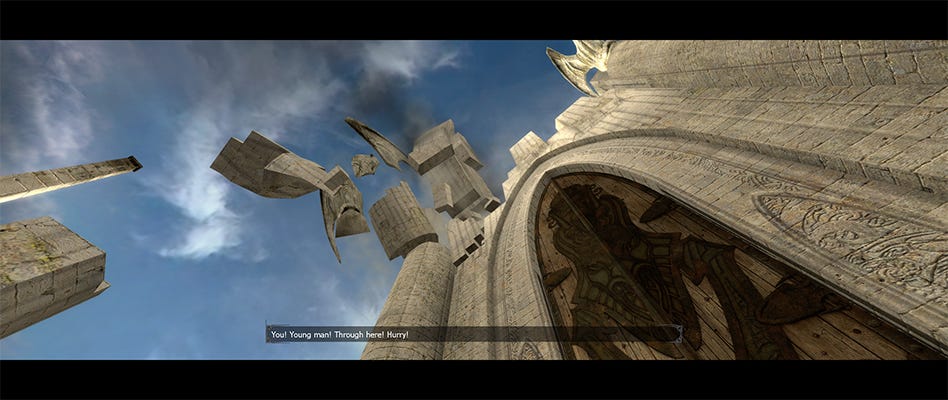
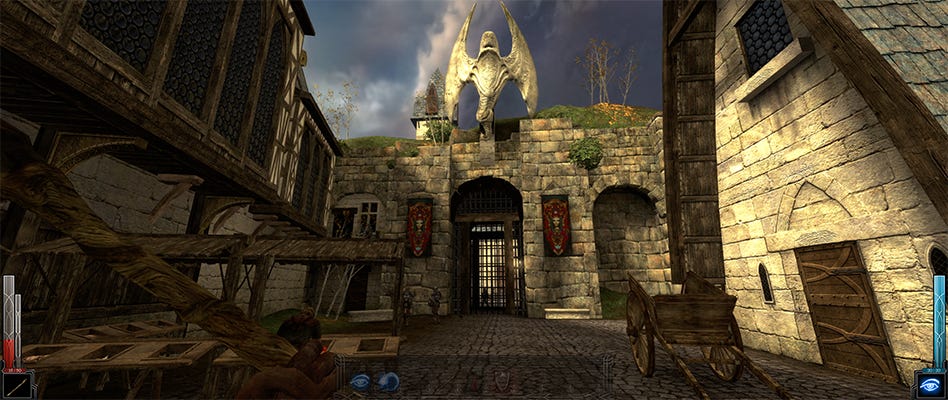
Starting the game, you’ll see a wall of ancient script, along with a voiceover speaking of prophecies, followed by a cinematic of a spiky looking character chucking a skull into a hole, along with a bit of blood. A big demonic thing rises from the fires thereafter, and the voiceover resumes. God knows what all that is about, I suppose we’ll discover more in due course. The screen cuts to black then and we hear the voice of our protagonist – Sareth, asking for his master. A robed figure emerges from the dark then, offering words of comfort. He tells us to pick up a spider artefact and search for something called the Shantiri Crystal. Of course, this all seems like nonsense at first, but hang in there. The first thing you’ll notice upon gaining control of Sareth is the atmosphere. While the game is certainly aging a little by now, with the settings cranked up, it can look truly impressive, and on a modern system it runs very smoothly. We begin the game by following our master’s (Phenrig) orders, having tasked us with finding said artefact. In doing so he has us exploring a set of old ruins, and this serves as our tutorial. Here we learn the mechanics of the game, and as this is an Arkane title, you can rest assured that it isn’t just a simple first-person adventure - something we discover as we explore the minutiae of the combat, exploration, magic, and physics systems.
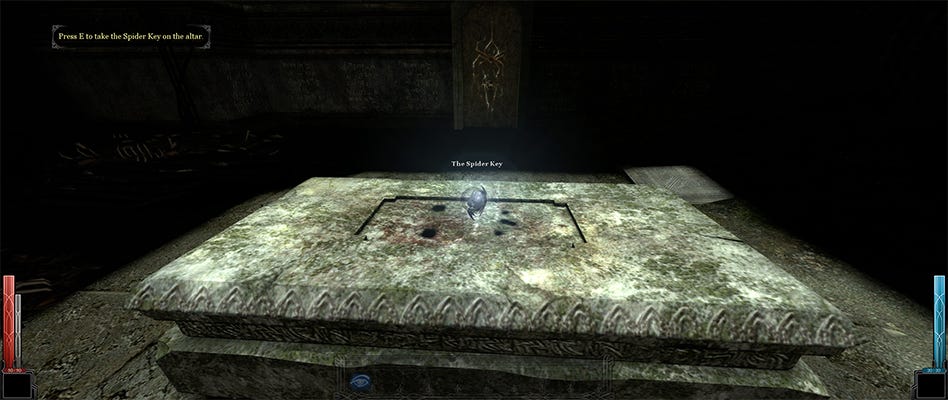
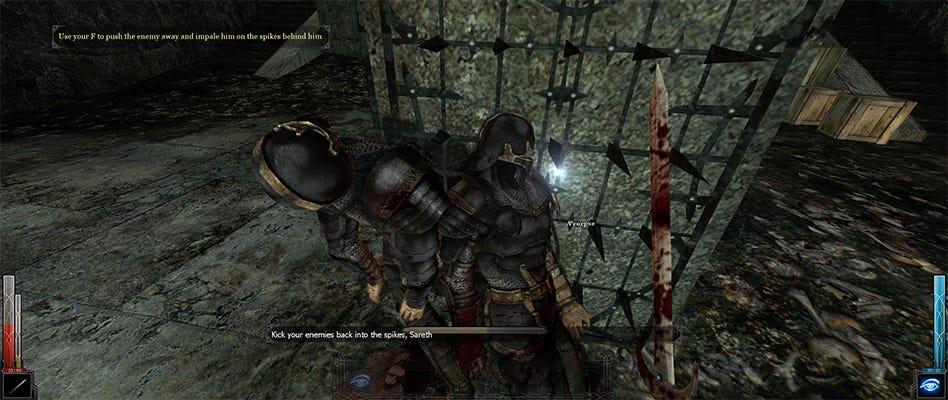
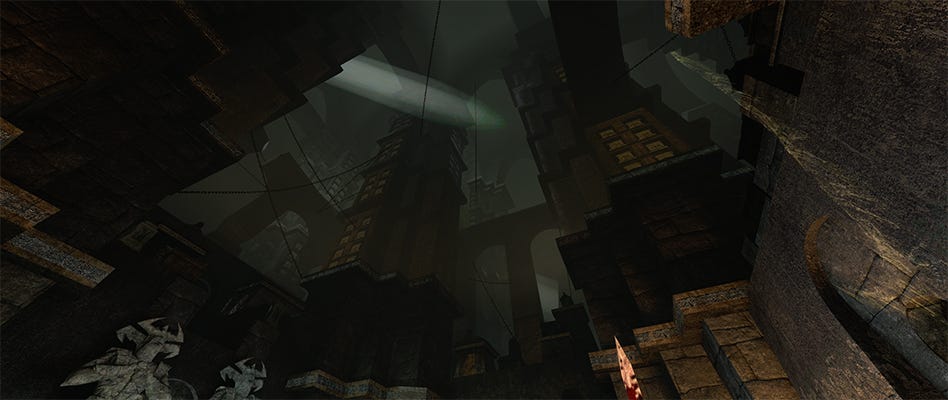
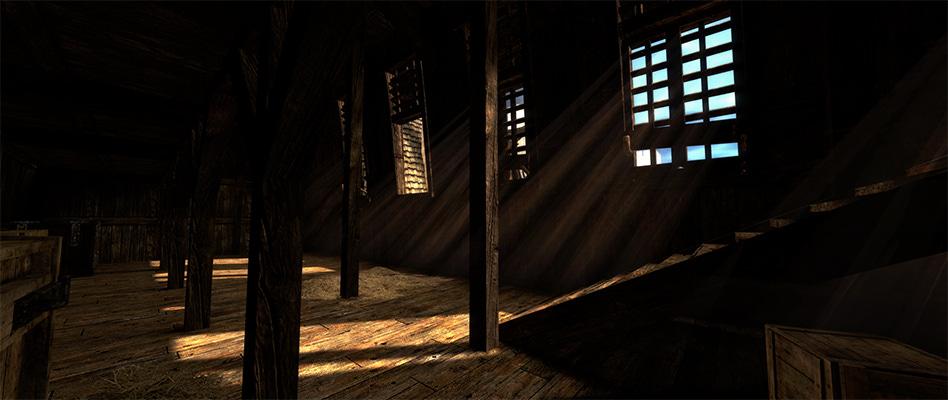
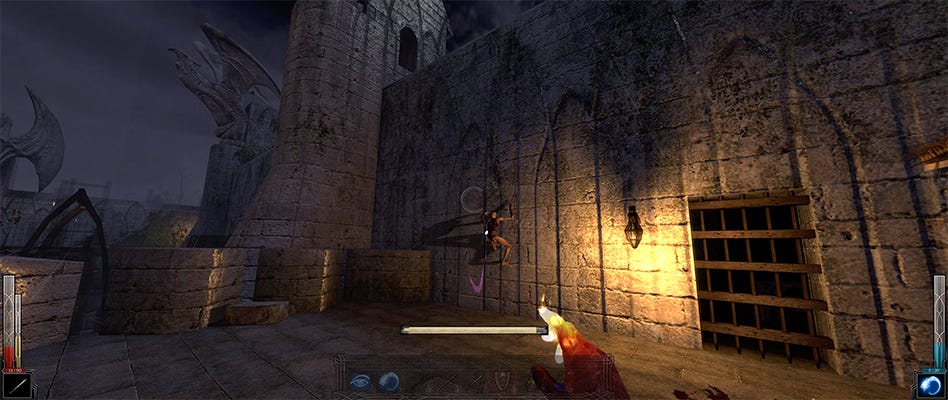
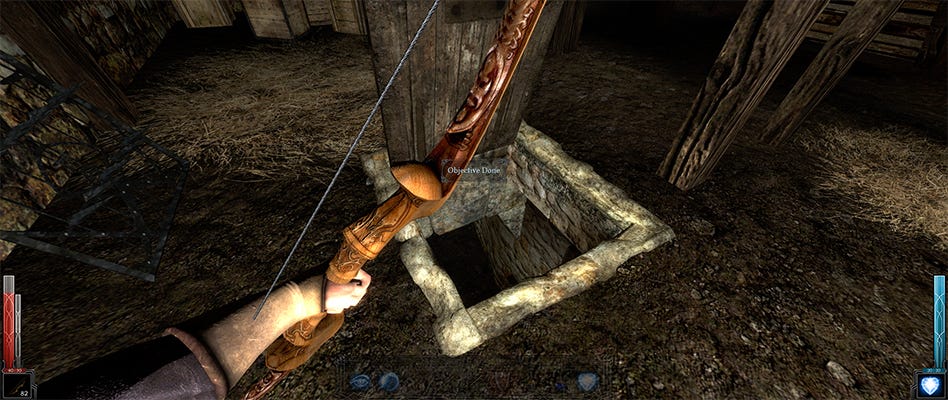
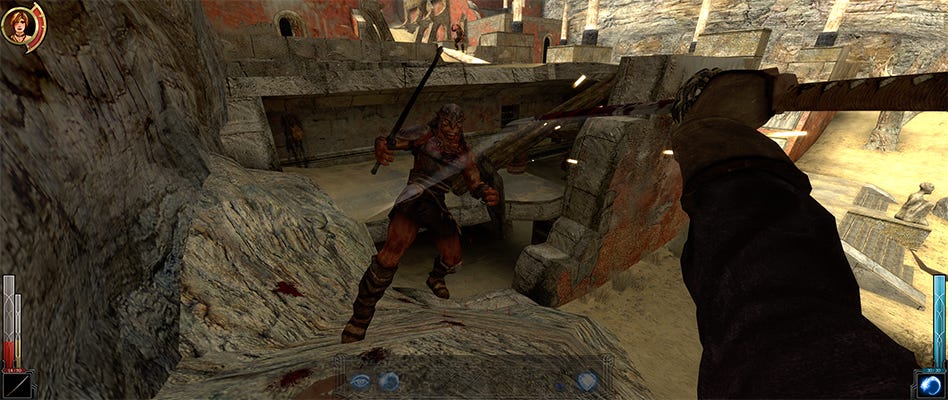
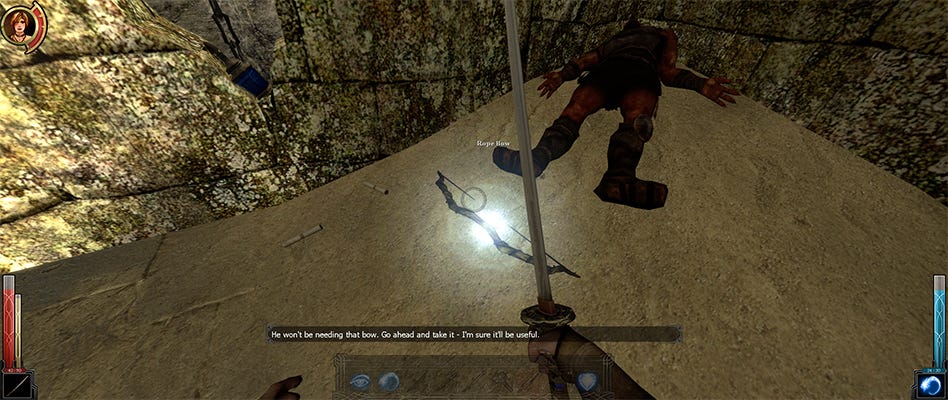
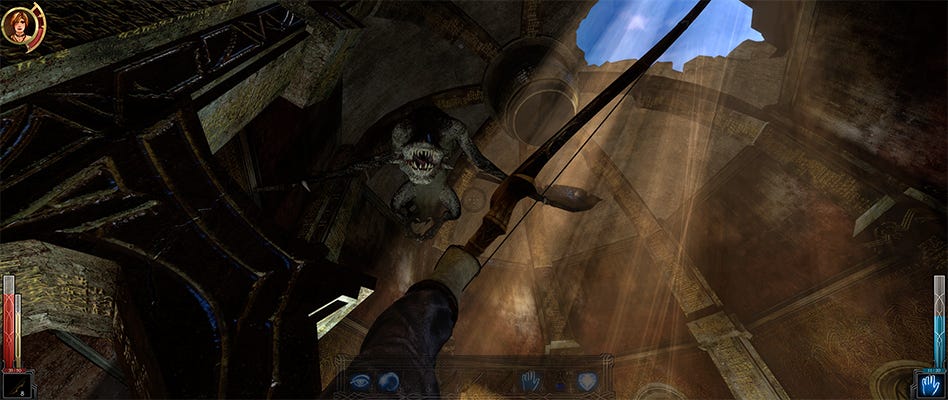
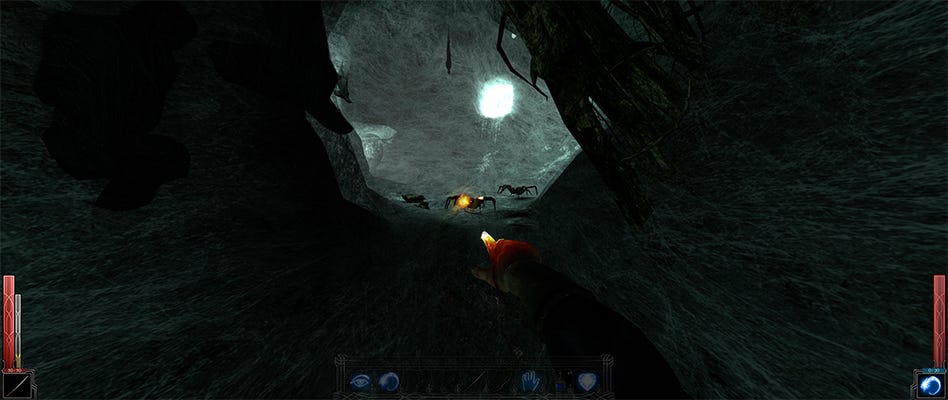
In order to proceed, we must locate the Spider Key. Luckily it’s just sitting in plain sight so we swipe it and open the way, moving through the space, learning the simplest of actions first, along with a basic introduction to the magic system by making use of our Dark Vision spell, which allows us to see in the dark. Before long we discover an undead bloke ambling about, and we are instructed to give him a big kick up the arse Father Ted style. He goes flying then, and we’re treated to a bit of combat with his fellows who rise out of the piles of crap about us. The sword play here is quite reactive, and you have to make contact with your enemies for the strikes to work (think Mount and Blade, or Jedi Knight 2 and 3) - the hitbox detection is pretty advanced, and it can take some getting used to. Luckily our master has the ability to remotely heal us if we struggle. Once we’ve learnt how to behead, we move on to some human enemies, and we get our first taste of impaling. Kicking people off ledges is fun, but it’s even more satisfying to kick them into spiky walls. The squelchy thud of skewered flesh is delightful. Here we get more combat practice as the flow of enemies continue. We find a bow here too and refine our skills. Just a tip, be sure to look up in this area, the level design is quite exquisite, and goes a long way to making the cavernous space feel part of some ancient and marvellous architectural triumph.
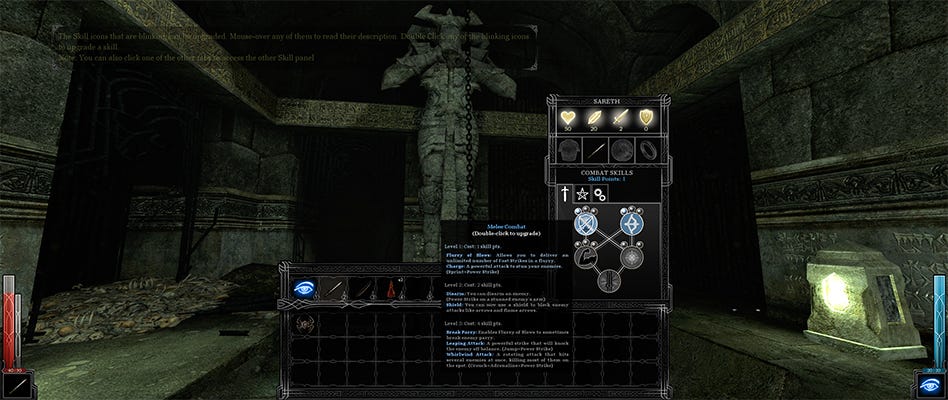
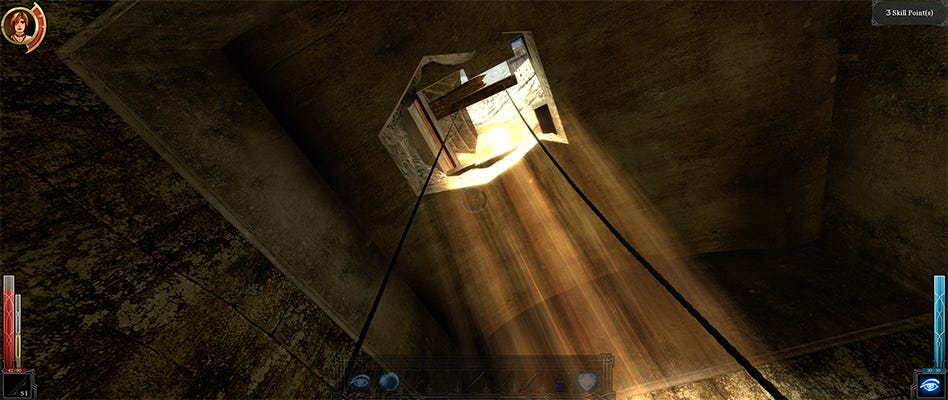
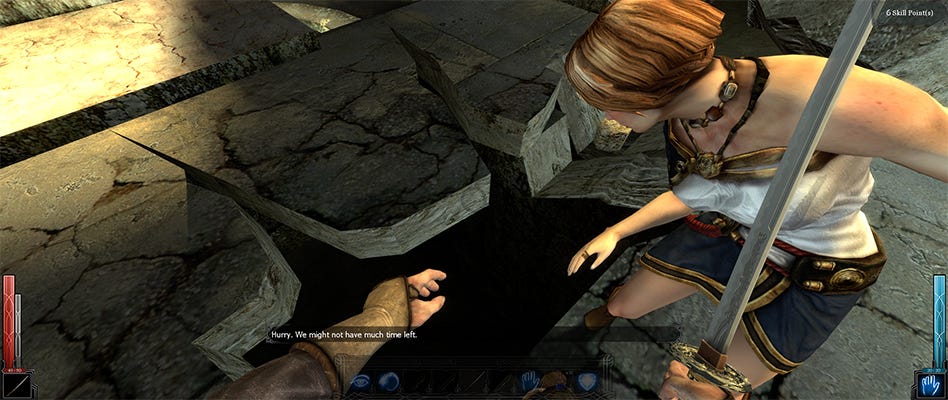
After this, we pass into another chamber and are awarded out first skill point. There are decisions to be made here and they will alter the gameplay quite a bit, and if you’re giving the game a go for the first time, it could be quite a challenge to decide what to go for first. This is an issue with most role-playing games, it’s difficult to know what you’ll be up against, so you have to go with your gut. I was already quite familiar with the game, but before this playthrough, it had been at least a decade since I last completed it, so naturally I forgot almost every useful detail. I played it safe and stuck a point in level one of melee combat. This gives us flurry, allowing us to deliver an unlimited number of fast strikes with our weapon. It also unlocks charge, which when used correctly can stun an enemy – all good stuff. Once that’s locked in, we leap forward and grab the dangling chain before us to climb into the upper level. We reach the crystal chamber then, and it’s time to pat ourselves on the back as the introductory section is done.

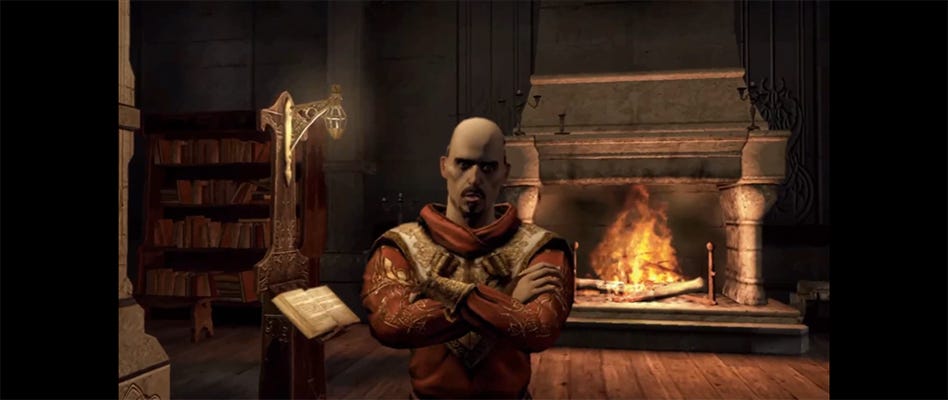
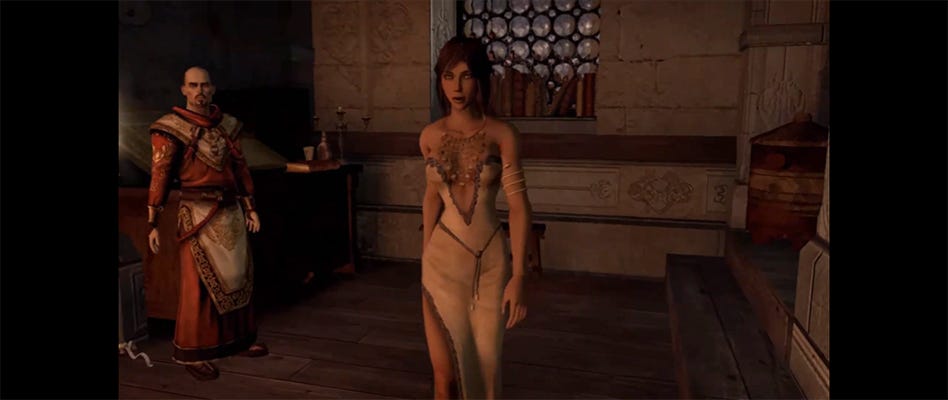
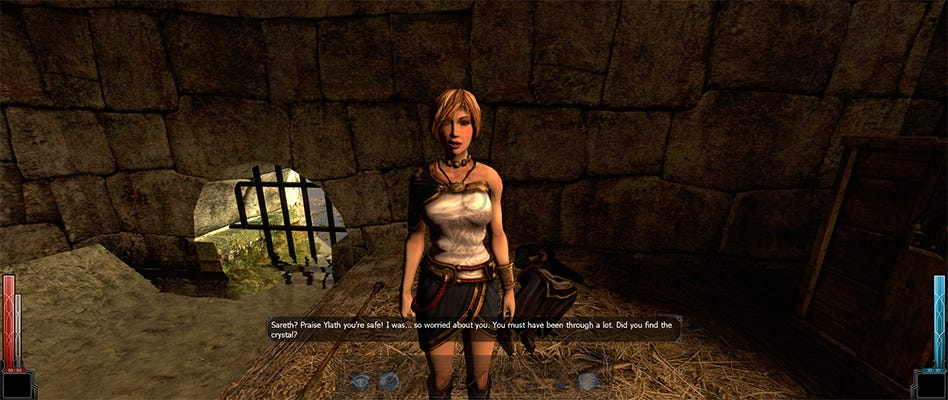
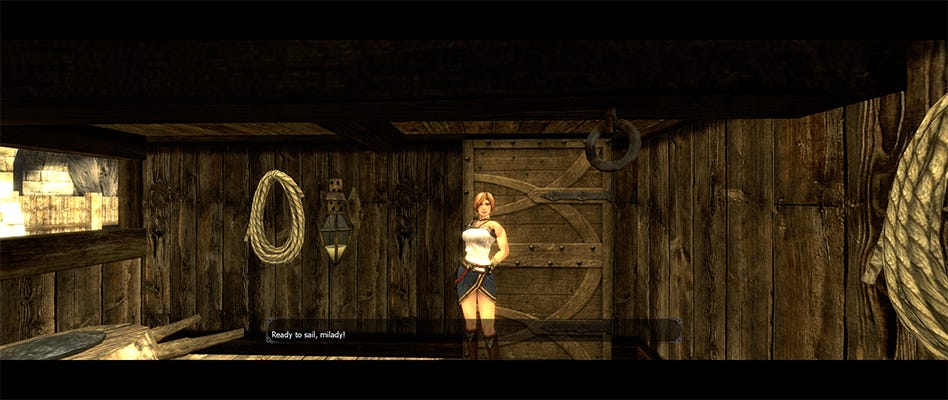
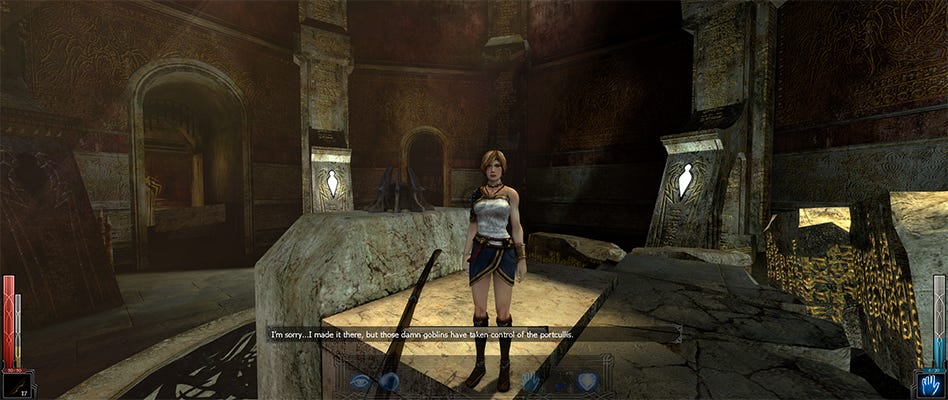
In the subsequent cutscene, we enter Phenrig’s chambers, and he congratulates us on our initiation into the art of magic. He says he’s sending us to the city of Stonehelm to meet a wizard named Menelag. He needs the crystal to continue his quest for the Skull of Shadows (the skull from the very first cutscene), and we’re to give the crystal to him. Sounds simple enough. Before we head off though, Phenrig swishes his fingers about and summons a guide and companion to go with us – this being the aforementioned half-naked succubus thing. This betitted woman, known as Xana, gives us an eye full of cleavage before somehow infusing herself with us. We now have an inner monologue, and she’ll act as a narrative voice over during the rest of our adventure. Off we go then, let’s just pretend that was a normal interaction.
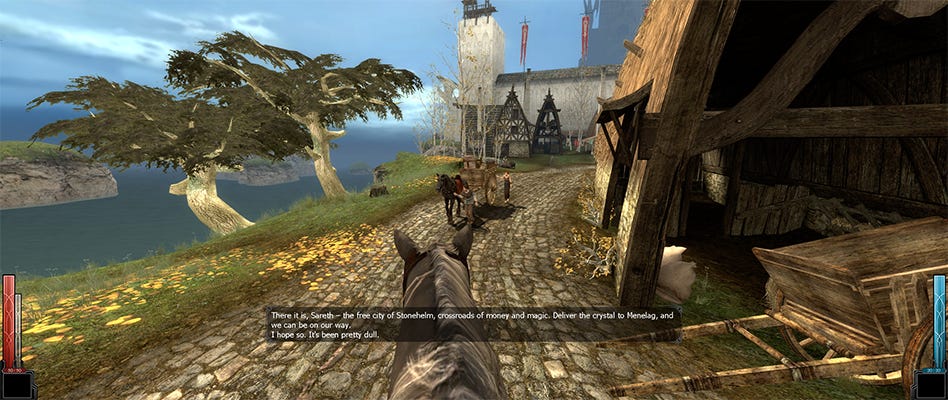
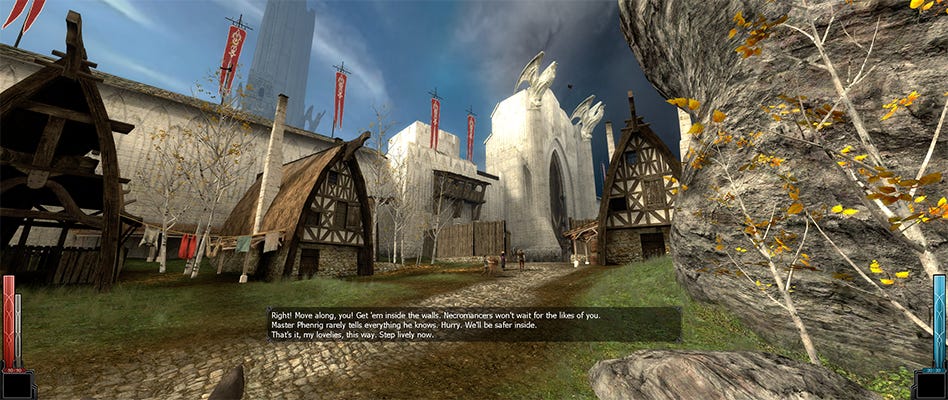
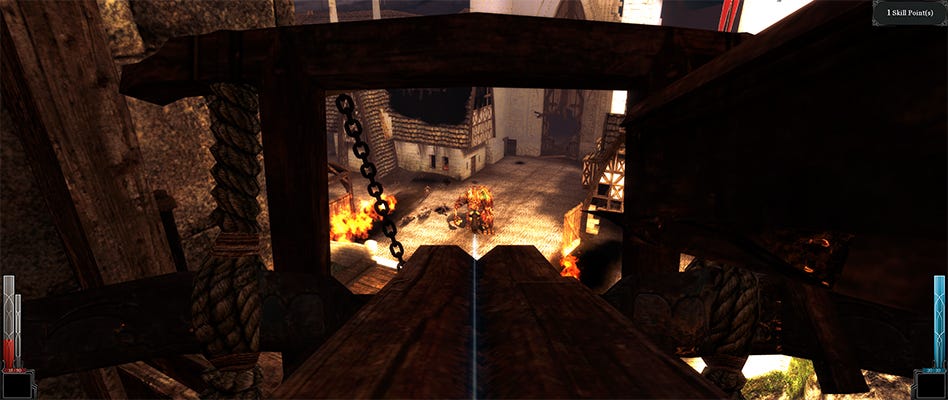
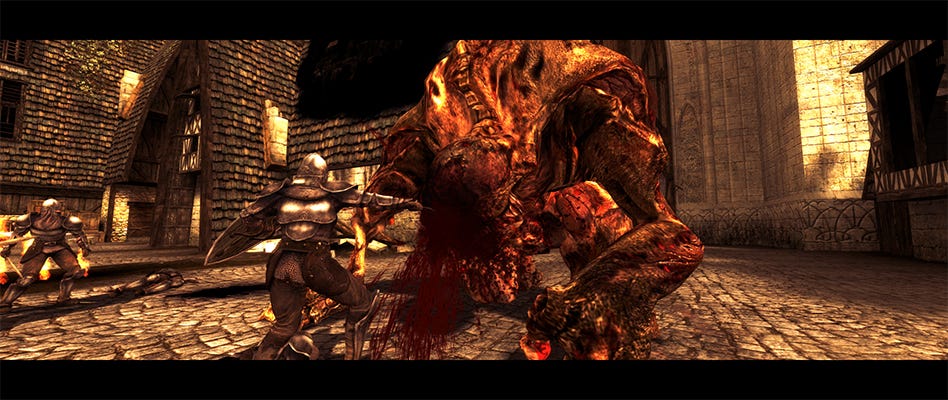
The next level opens with us riding our horse toward Stonehelm. The demon Xana in our head is chatting away when we overhear from a fleeing villager that there is an army of necromancers on the way. Shit. We ride up to the gates and as we state our business to the guard, the attack commences. A fireball impacts one of the gate towers and it collapses around us as a hoard of ghouls and a cyclops break through the outer defences. We’re thrown to the ground in the chaos and only survive because we’re dragged to safety by one of the guards. All hell breaks loose then as we must peg it through the city, climbing up ropes, navigating our way through structures, and leaping off rooftops, all while being harassed by the invading enemy force. The game does well here to make the world feel quite alive, with villagers and guards going about their business, and this is only made better as the attack intensifies. The city militia are seen engaging in combat and preparing the city’s defences, and you really feel the urgency of the situation as you hurry through the level. With some frantic portcullis closing, we’re led up to the next level and told to man the ballista. Here we support the troops on the ground and fire upon the cyclops, weakening it for one of the guards to run his sword through its eye. Blood pours from the resultant hole and cheering can be heard all over as the attacking force retreats with the loss of the mighty beast. Time to fill our pockets with all the bread we can find, I think we deserve it.

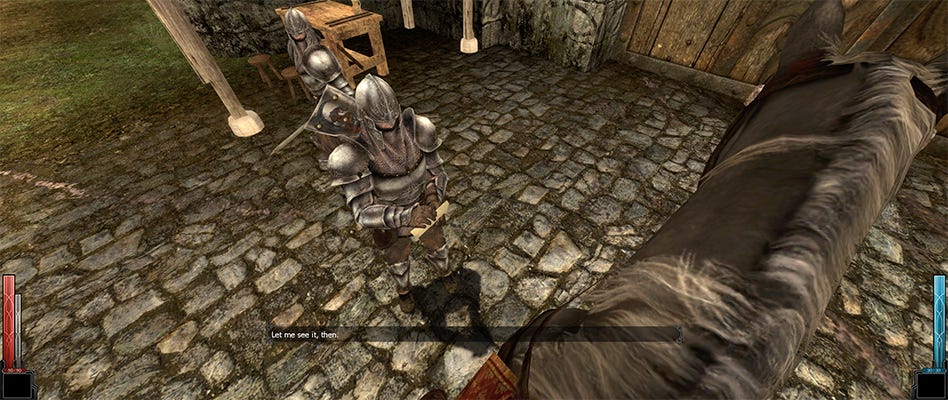
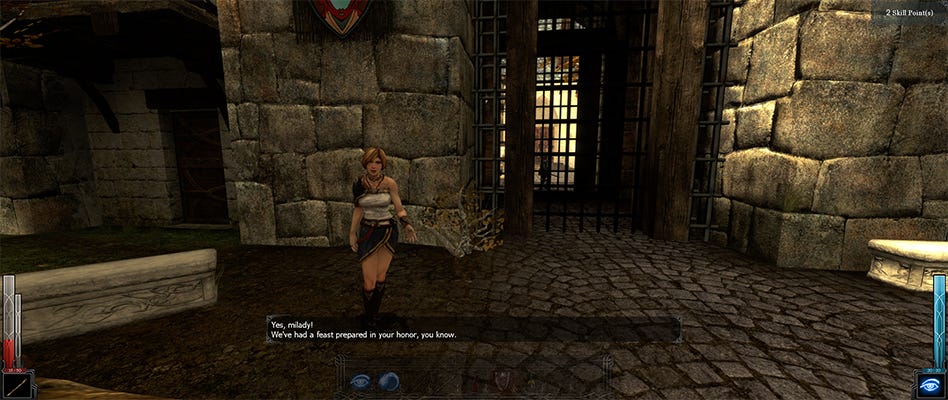
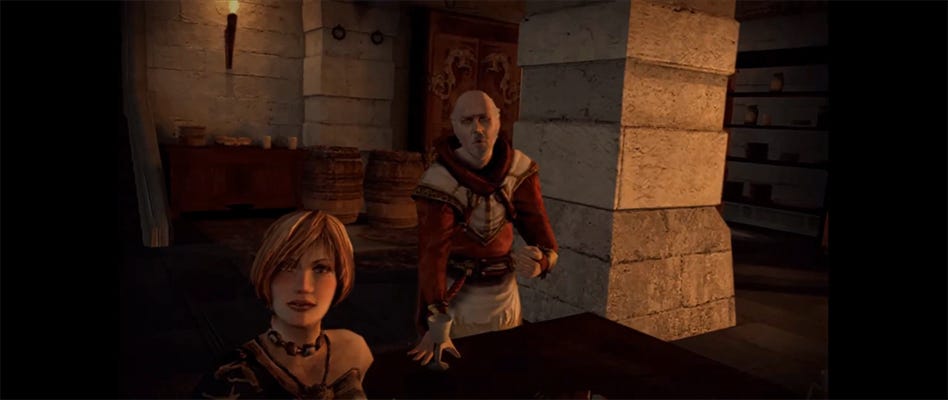
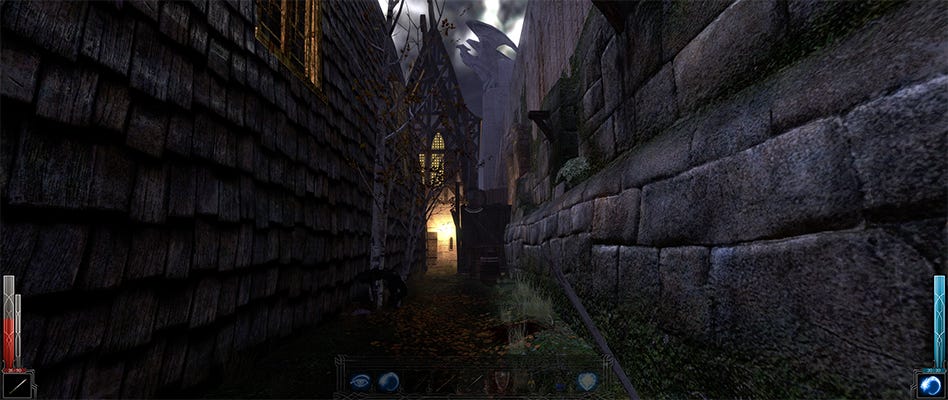
Continuing on, we come to the next area of the city and in one of the guard rooms, we find a bow, a staff, a dagger, and a shield. We also spend our next set of points, unlocking eagle eye, which allows us to zoom while using a bow. We also pick up alertness, which allows us to detect hidden object when standing still, the flame arrow spell, which allows us to fire a magical flaming bolt, and lastly, we dump a point in stamina. Once we’re set, we’re given the freedom to explore the city (or a little slice of it, at least) in search of the wizard Meneleg, and again the level designers have done a good job in making the are feel far bigger than it actually is. There are gated sections you can see beyond but not reach, there are lots of little alleyways, various buildings we can go in, and dozens of guards and villagers milling about. The city feels alive, and everyone is talking about the attack, reacting to the in-game events. Good stuff! We eventually reach Menelag’s place and find a woman waiting for us outside. Leanna is her name, and she’s both Menelag’s niece and pupil. She welcomes us inside and we’re offered a lovely feast with the Wizard and his people. Dinner discussions suggest that Arantir, the leader of the attacking force might be the Dark Messiah, but Menelag dismisses that. Leanna heads off to bed just then and Meneleg seems touchy about our quest possibly getting Leanna in trouble. He seems somewhat calmed by Sareth’s dim-wittedness however, and before we know it, we’re off to bed ourselves.
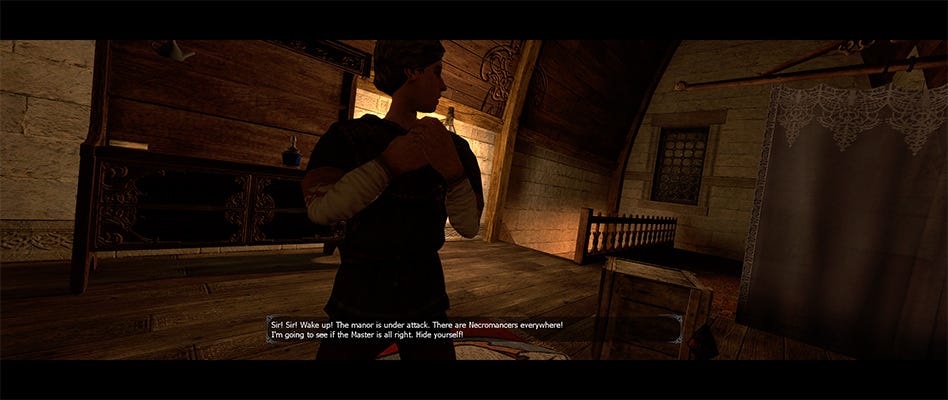
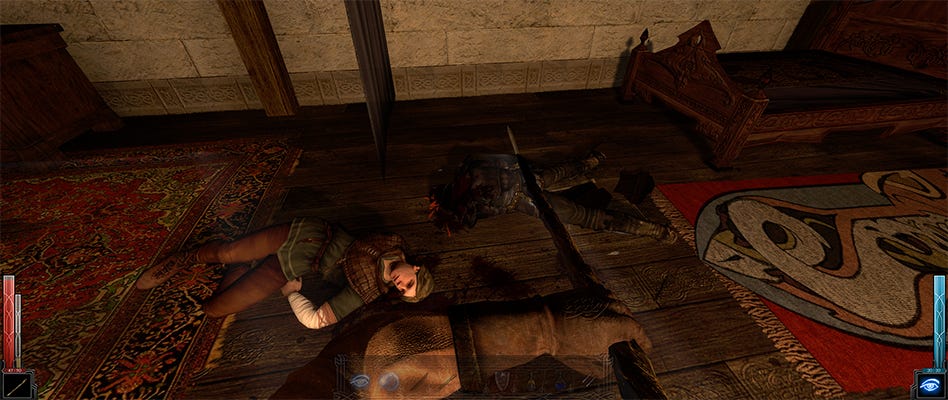
The next thing we know, we’re being woken in the middle of the night - Menelag’s manor has come under attack! We swipe what we can in the room and find ourselves in combat almost immediately. The poor bloke who woke us dies, unfortunately, but so does our attacker, so it isn’t all bad. We get a bit of a breather then, and we have a chance to spend our next set of points. We go for level 2 in archery for a steadier aim. We get an opportunity to test our skills immediately then. As we peer out of our bedroom window, we can see two enemies hanging about in the courtyard - time to get shooting! That doesn’t quite go to plan, unfortunately. The guards, along with another of their comrades begin to hunt us down. A bit of frantic combat follows, but some strategic kicking into the fireplace burns two of them up, and some bashing with the staff finishes off the third.
After that we sneak through the grounds of the manor, killing our enemies using environmental traps and our new flame arrow ability, being sure to hoover up every potion we can find along the way. Eventually we find a way back inside through the basement and as we load into the next area, we are awarded another skill point. This time we don’t have enough for anything particularly useful, so we save them for later and continue on our way. Lots more killing thereafter and as we explore, we find a magical ring behind some barrels, as well as a hidden room full of spiders – fantastic. Secrets in this game are numerous, and they are certainly worth keeping an eye out for. Many powerful pieces of equipment can be found this way and can make a huge difference in combat.
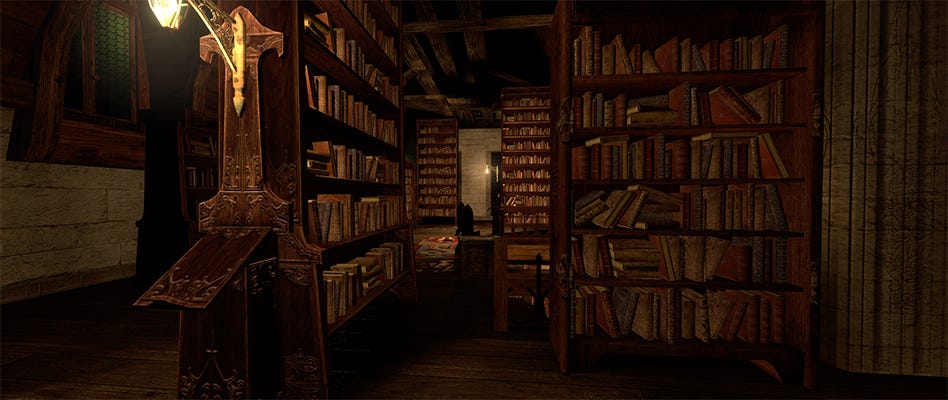

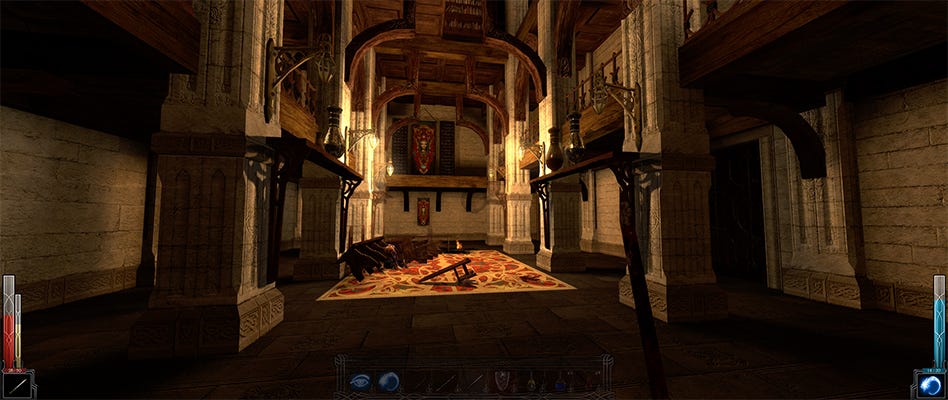
On again to the great hall, and there we have a mighty big brawl. Swordsman and archers come for us, chipping away at our health rather considerably. We only just survive the encounter, but survive it we do. We chug a couple of potions and stuff our face with the food we’ve looted, and we continue our explorations. We move through the library and climb into the rafters to find more secrets. The lighting in these areas produce a great atmosphere, and the tense musical stings really add to the feeling of authenticity infiltrating the overrun manor. Eventually we climb out onto the roof and after kicking a bloke off the edge, we continue towards Menelag’s room to retrieve the crystal. The demon in our head tells us that the Wizard is expendable, but the crystal isn’t – we better hurry then.

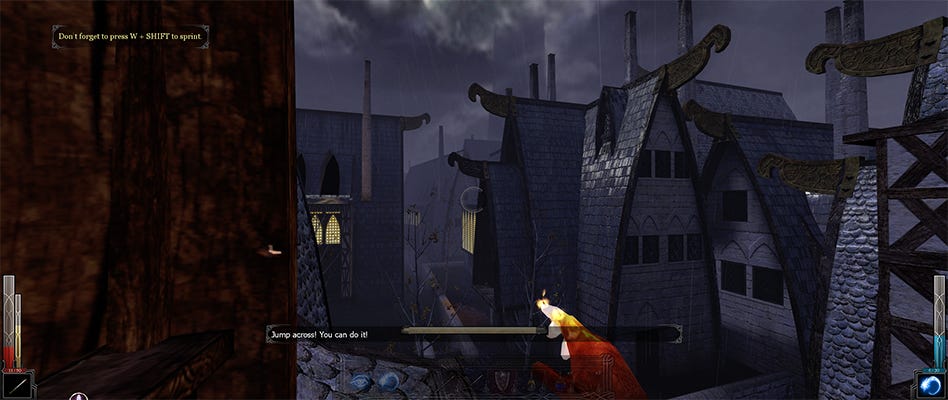
Just as we come to Menelag’s chambers, we hear struggling from within, and after climbing the steps and opening the window, we find the old man and his niece under attack. Unfortunately, we get frozen by the attacking Wizard and must watch as the fight plays out. Menelag kills the wizard, but a ghoul wounds him badly, stealing the crystal thereafter. Leanna stays with the wizard as he dies, and we chase down the crystal stealing ghoul. This starts quite an exciting set piece in which we must dash across roofs and through buildings in pursuit. Villagers cower as we burst through, and bodies fall from heights as the ghoul tears across the city. Rain lashes down and thunder echoes about us as we try to keep up with the beast. Eventually we lose track of the crystal and momentarily find ourselves out of the elements. Here we take a moment to regain our bearings and to spend our accumulated skill points. This time, as we seem to be forever low on health positions, we pick the heal spell, along with the prerequisite of telekinesis, which allows us to lift objects and living creatures depending on our mana level. Once that’s set, we jump down into the city streets and resume our search. Here the game reveals its many approaches - you can either sneak into the upcoming warehouse via the sewers, charge in through the courtyard, or climb up to the opposite battlements. Either way, you’ll need to acquire a key. We go via the sewers and sneak around a bit before being discovered. After crisping all the soldiers with our flam spell, we go about looting the joint, picking the keys from the dead as we go.
We then find an assassins Garb and a nice shiny new long bow in the opposite building – quite the upgrade as the bow is +4 damage, and the garb is +1 armour class and increases out stealth ability. Unfortunately, we can’t use the armour yet as we lack level 1 stealth, but as luck would have it, we acquired another skill point. So, we bang a point in stealth and don our new outfit and bow. Much pinning of heads is in our future. Back inside the warehouse and we descend through the trapdoor.
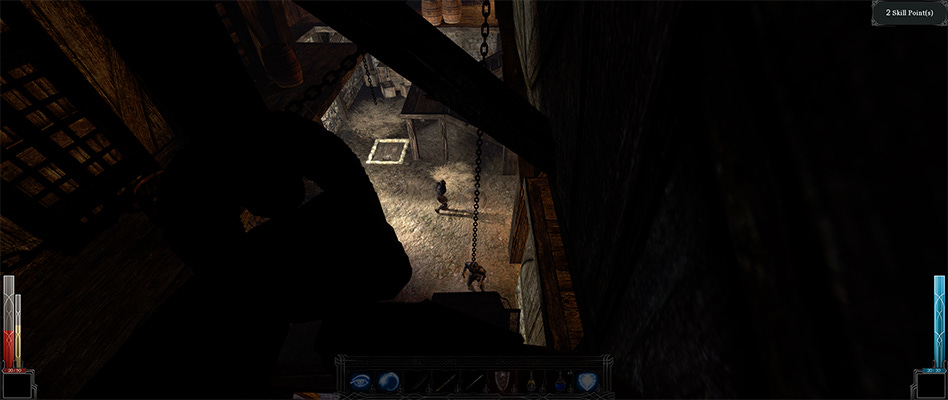

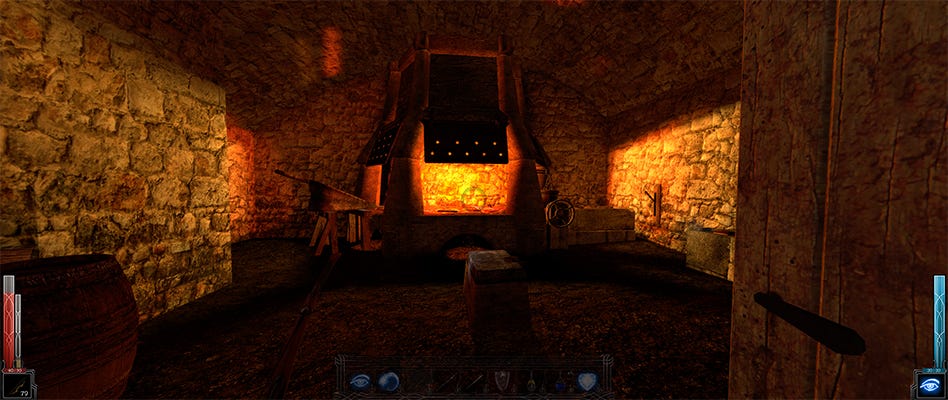
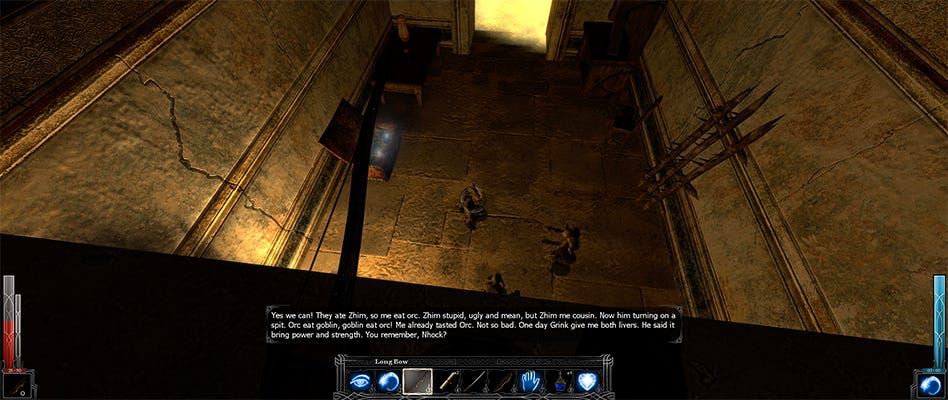
Now, as a child, I was warned not to go into that trapdoor, as there could be something down there, but as Boney and Berk aren’t around to dissuade us, we proceed. We get another skill point then, and the demon in our head pipes up, suggesting that our father will be displeased if we die. Other than stating the obvious (or what I hope would be obvious, if not he’s a dickhead of a dad), she implies that she has been in his head too… or pants, quite hard to tell. Either way, I think Sareth should push those thoughts away and continue with the mission. We enter the next room to hear the distant voices of our enemy, so we sneak about a bit to see what’s what. We overhear that Leanna is tied up with the prophesy of the Dark Messiah somehow, and one of the guards mentions that he was foretold he would die today. Let’s make that happen. Our new bow makes incredibly short work of these guys, and we’re free to explore. We find an upgraded Staff with +2 damage and a forge room. Here we find an ingot and all the tools we need to make our own weapon. After a bit of smithery we have a brand-new long sword with +3 damage! Cue evil laugh.

From there we squeeze through a gap in the wall and follow the glowing mushrooms through the network of tunnels, picking up a ring from a corpse along the way. We kill some more blokes then back track a little to see what we missed. Turns out a lot, in the barracks we find a naga silksword with +3 damage and a chance to perform a critical. A bit better than the one we made, but we can’t use it until we get the critical hit skill, and we also find some chainmail, but we can’t use that until we get endurance levelled up… So, some good stuff, but not useable right away. We also find a corpse pinned to a beer barrel by a poison kriss, we can’t use that either without more points in stealth – bloody hell!
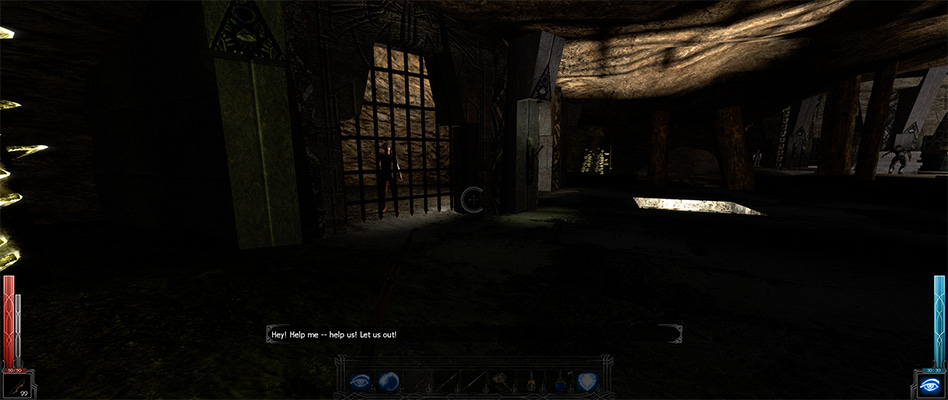
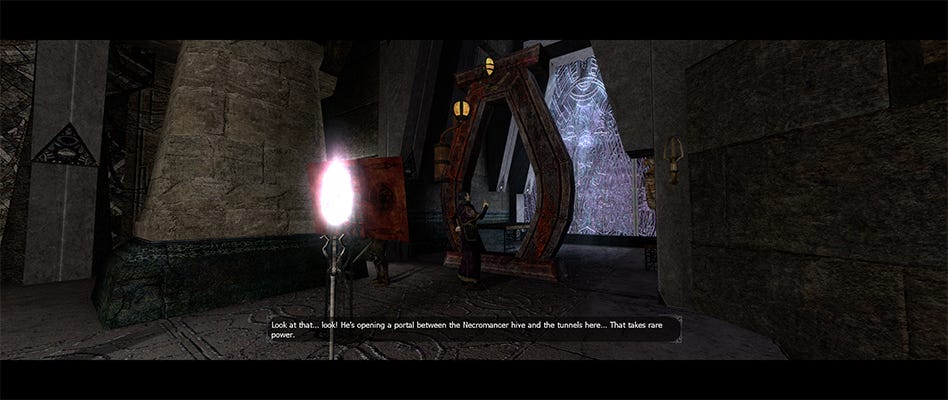
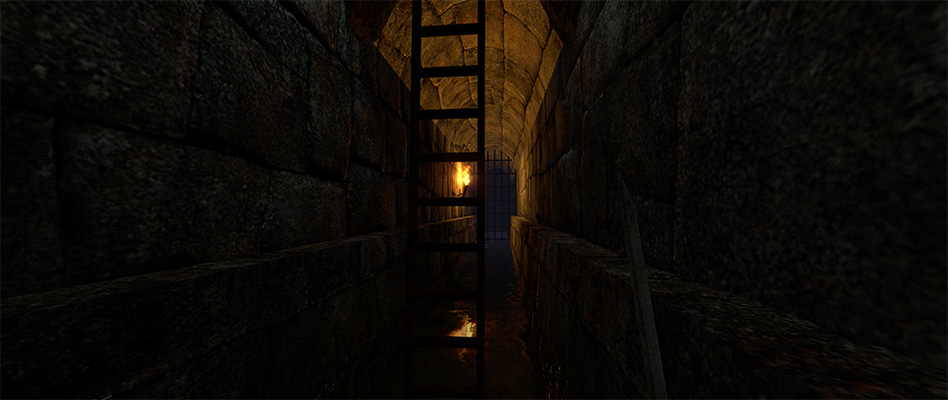
After moving through the caverns, we find a breach in the wall. Peering through we see a large space filled with prison cells and a handful of soldiers, along with the crystal and Arantir. Our demon warns us that he is beyond our power, and we watch as he attempts to open a portal using the crystal’s power. We must cause a distraction and steal the crystal without getting caught here, and a little way back we find a sign warning of the prisoners having attempted an escape, so we use this to our advantage. We pull a lever to unlock the cells, and as Arantir and his guards turn their attention to ridding themselves of the prisoners, we sneak in and swipe the crystal, darting out through the waterway before anyone notices.
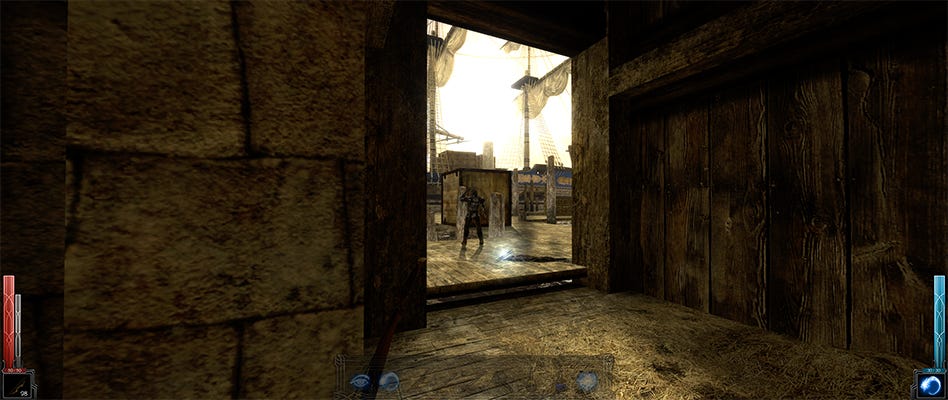
As we escape, we get a vision of our meeting with Phenrig, but everything seems off, and it transpires that he summoned Xana to keep an eye on us, and we get a glimpse at her more demonic form. We wake to Xana’s voice in our head, attempting to calm our nerves about the vision we had. She says she’s an ally and suggests that she could be more than that… Okay. We carry on to find Leanna regardless, and here we get a little sense of the jealousy the demon has for her, which probably isn’t a good sign. Anyway, we find Leanna by the docks and through the drainage grate we can see Menelag’s ship. She says that if we can board the ship and lower the gang plank, she and her men can recapture it, allowing us to make our escape. Sounds simple enough, but we’ll see. Before heading out, we spend our accumulated points on the last level of archery, allowing us to nock an arrows much quicker. Should be useful! We emerge into the light after our chat with Leanna and it’s quite a shock to the eyes after being trapped underground for so long – the sunny exterior makes a nice change. After killing one of the guards, we find a new staff laying on the dock, and of course we can’t use it, so we’ll keep it safely in our bag for now. Once we’ve killed the patrolling guards, we edge forward towards the ship only to be killed instantly by a barrage of ballista fire. Try again. This time we take a dip in the water and successfully climb aboard the ship from a different angle.
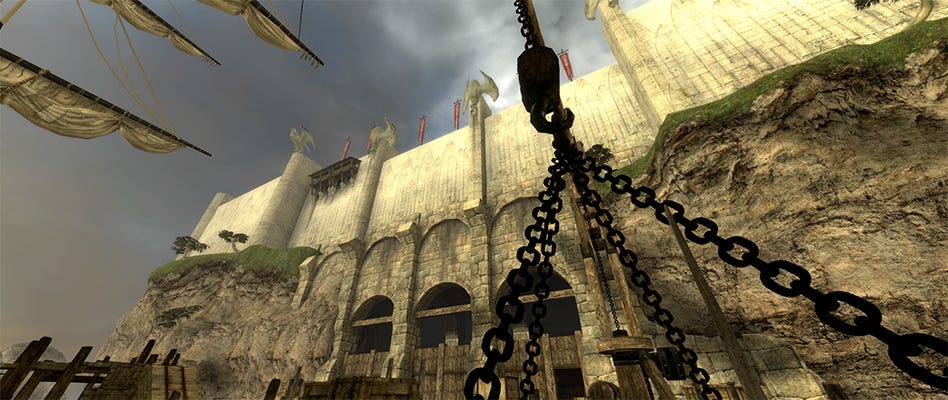


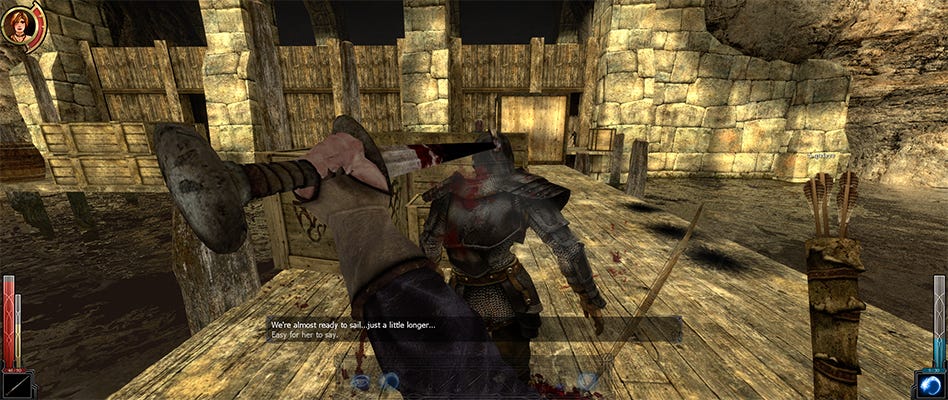
Moving through the ship we kill a bunch of soldiers, pin some wizards to the wall with our bow, and generally loot the place. Eventually we come to the cargo hold and find the cells full of goblins. We can free them and have them fight the crew, or we can just leave them to rot. We pick the latter and get on with our lives. Eventually we kill all the soldiers inside, finding some wizard robes and an elven bow. We can’t use either, as is the way, but they’re good for later, I’m sure. Some of these weapons require critical hit, so we save our points for later. Out on deck, we clear the rest of the Menelag’s crew, and after that, we must defend the ship as several waves of enemies come after us, including wizards, archers, and swordsmen. Unfortunately, we must make sure Leanna’s health doesn’t diminish too - the AI in this game isn’t incredible, so she requires some babysitting. Once we lower the gangplank, she hurries aboard, and the attack begins. We get plenty of opportunities to use our sword here, and it seem the best course of action is to charge out and deal with the attackers close up. The game really shines when the combat gets busy, decapitating, sword locking, and stabbings. The animations are varied, and the combat system is far more advanced than it needs to be. Enemies will dodge and parry too, and it combines to create a deep swordplay simulation. Holding directional arrows will change our stance when holding down the attack button and this broadens the combat considerably. After the combat is done, we prepare to cast off, and before we do, Leanna builds up the courage to explain how important Sareth has become to her. Xana does not approve, but the moment is interrupted swiftly anyway. Onwards to new lands!
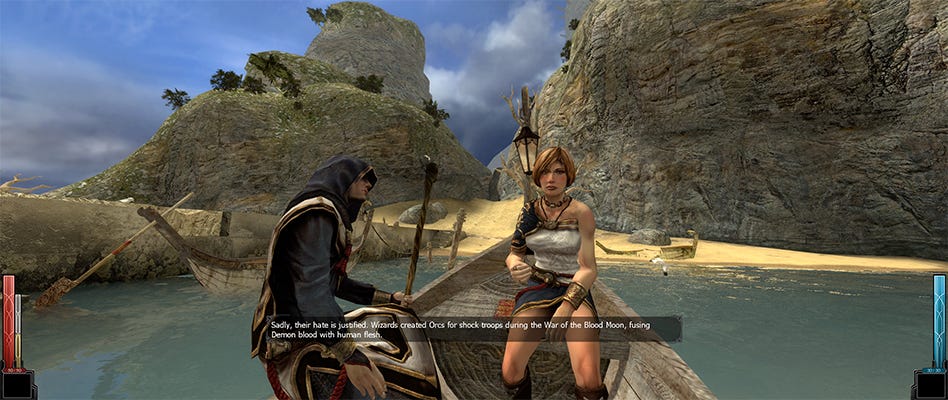

As we sail, we get another vision, this time with Arantir and Leanna dancing on the deck of the ship. They notice us and speak of our destiny and doom. We dance with Leanna then and in the dream, we stab her, which Arantir seems to approve of. He mentions that she won’t be our last victim… Another ominous thing to mull over. We’ve no time to think too deeply however, as before we know it, we’re rowing towards the beach with Leanna and two of her mages. We get a little lore about how the Orcs were created as we go, and it seems the island is crawling with them. We’ll channel Legolas with our bow and try to keep count of how many we kill. Before following our mates up the hill, we spend some of our points on critical hit. This allows us to use the naga silksword and gets us one step closer to using the elven bow. Once we enter the valley, we find a wounded soldier. He warns us of a Pao-Kai (shrug), but Leanna thinks him delirious. Sareth askes the obvious question, and Leanna explains that a Pao-Kai is a degenerate dragon… Great. Moving on, we find the entrance to the temple surrounded by Orcs. One is giving a pep talk to the others, but it’ll do them no good – we’re in a killing mood today! After the small cutscene, we’re told by the game that we can now control our allies to a certain extent, having them either follow or wait. We decide to leave Leanna safely behind for this section – NPCs can rarely be trusted to safeguard their own lives and I don’t trust my aim with a bow not to shoot her in the back of the head.

The setting here is another nice change of pace visually, with a lot of verticality. The level designers have done a great job giving both the enclosed and open spaces a feeling of grandeur. Anyway, moving through, we find that the Orcs are incredibly tenacious – who’d have guessed. Counting only on our longbow probably isn’t going to cut it, so a combination of the bow, our sword, and our fire spells it is! Also, after dying several times, we decide to bring Leanna along with us… perhaps she’s not as useless we initially thought. She does die about a dozen times thereafter, but her healing ability is invaluable. A tricky section, but after a few goes, we get through it, killing the dozen or so Orcs. Once they’re all dead, we have a chance to explore and to find a way to breach the temple.
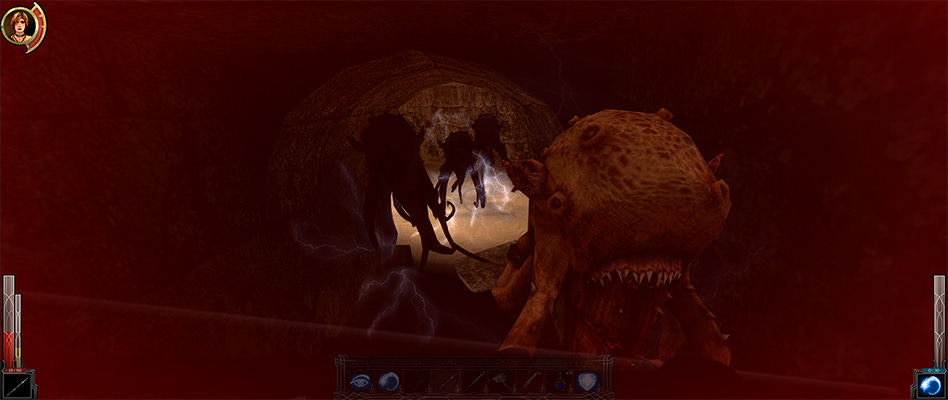
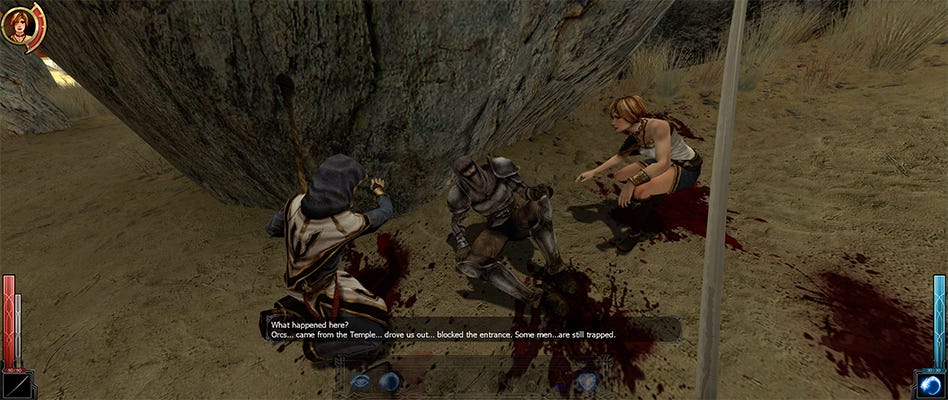
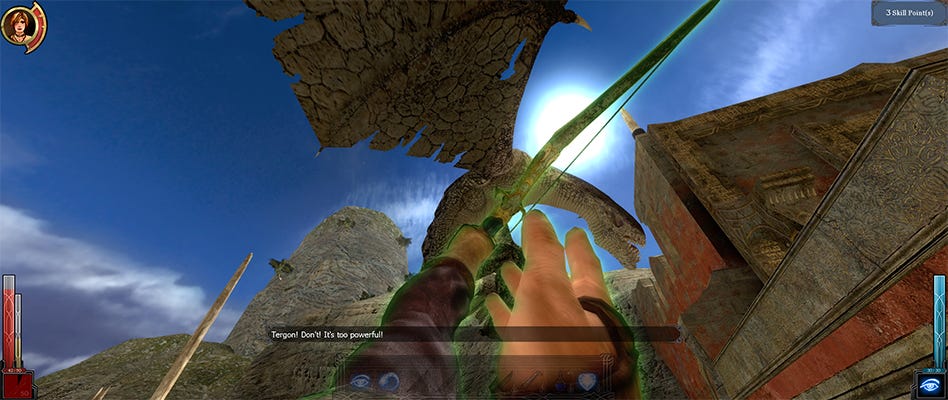
Leanna has us drop down into the tunnels below the sand, and as we explore, we get set upon by a group of monstrous squid things. Very Cthulhu-esque. Time to go wild with the sword swinging and a bit more flame arrowing. Once calamari is back on the menu, boys… we eventually find the rope bow. This allows us to attach climbable rope to wooden beams throughout the game. Very useful indeed. We’re told then to escape the tunnels, but rather than going the obvious route, we turn back and follow the previous tunnel. There we find a chamber with another new bow, this time with added poison! Less damage than our current bow, but the poison could clinch it. We shall test it soon. Not quite yet however, as the aforementioned Pao-Kai shows up. Tergon tries to take on the thing but dies, and it’s just Leanna and I now. Time to run away and kill some Orcs as we go. Eventually we make it to the entrance of the temple and find one of Leanna’s men, Duncan, hiding there. He heads back to defend the boat, and the pair of us continue in search for the skull.
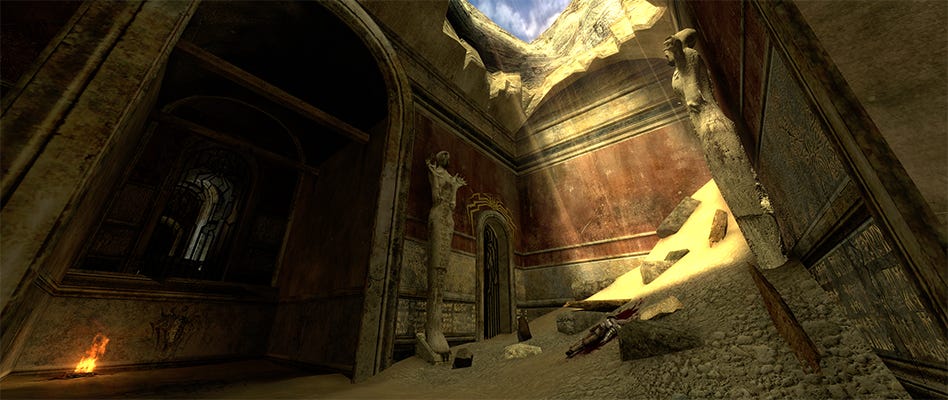
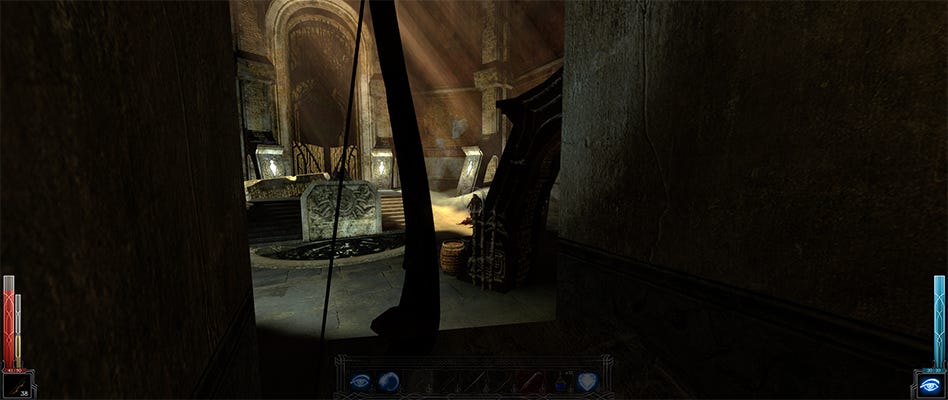
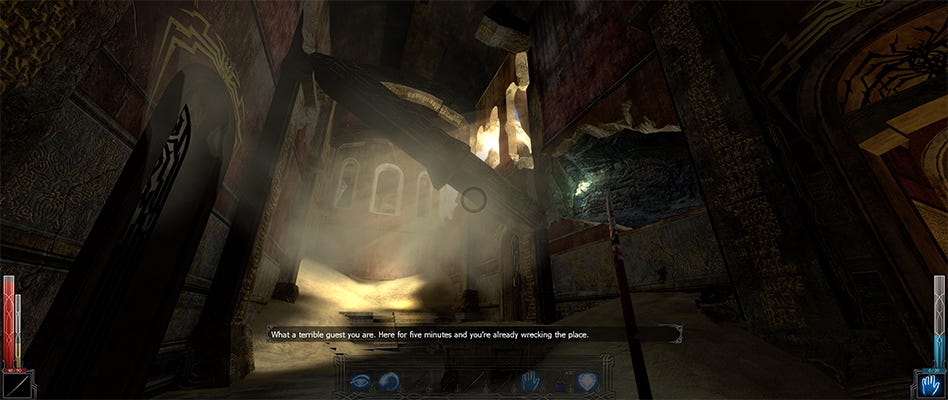
Entering the temple feels very Indianna Jones, with wonder evoked by the strings in the background. Leanna leads the way, and we discover the intricacies of the tomb. There we find a ring of regeneration, which is quite handy, and another locked door, which we must open. Sareth’s job is never done, is it? We shoot a rope arrow up on the beam and climb to the next level. We then open the way, kill another group of Orcs, and then secure the main chamber. There Leanna remains to prepare her spell, and we continue deeper into the structure to explore. In the next chamber, using our telekinesis skill, we replace a fallen statue and unlock another secret location. This time we get a superior naga silksword and a bunch of potions. Can’t use the sword yet, of course. Four more points until critical hit level 2! Moving on, and we find some goblins in the next room. After killing them we go about wrecking the place by knocking some pillars and statues over. We climb out of there and into the upper levels then, and as we do, we hear the Pao-Kai roaring in the background. Xena warns us that we might have to kill it later, but we’ve got enough on our plate for now. We continue and find more Goblins. One of these guys triggers a trap and gets himself crushed – hilarious. We also find some more loot and spend a bit of time sorting out our terribly cluttered inventory. Much shit has been picked up, and much of it needs to be left behind. Once we’re sorted, we head back to the main chamber, having been cut off by another bunch of Goblins, and upon returning to Leanna, we find that the Pao-Kai has decided to attack, breaking its way through an opening in the ceiling. We frantically shoot arrows at it until Leanna suggests we drop the portcullis onto its head. Job done!
Leanna moves some masonry then to reveal an alternative path through the temple, and we climb down to find a set of catacombs. Dark, and full of fucking spiders. This place is horrible, but it doesn’t last too long. Luckily, we have enough manna potions stowed away to keep the flames going. After murdering everything with seven or more legs, we arrive at another chamber. Good. Unfortunately, a ton more spiders start climbing down the walls to get us. *shudder* In order to get past this, having used most of our potions in the last room, we need to invest in magic affinity, equip our mage robes, and make careful use of our fire spells, stone skin potions, antidotes, various scrolls, as well as our mana ring. After a lot of fighting, we finally clear the place and are free to explore once more. Climbing up the vast circular chamber, we find the exit, but going up even higher, we find another secret, this time an endless quiver. The red bandanna of Dark Massiah.

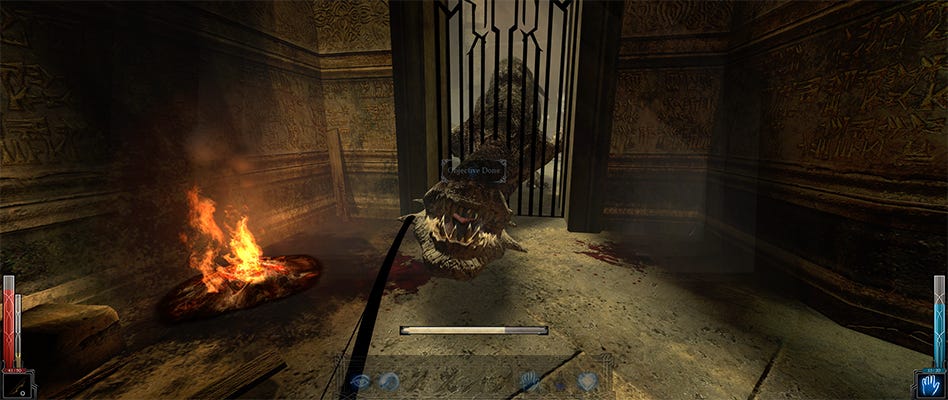
We continue on then and as we make our way out, Xana says she can’t speak freely as someone might be listening… WHO? She also says that we need the skull for something else… ok. And that we should forget Leanna. Right. Odd stuff, but we carry on. The whims of these two women are what drive us after all. We carry on along the cliff opening and find another way inside the temple, this time dropping into a big basin of water. We have to swim down and flip a switch to raise the water level. Rather reminiscent of the cistern level in Tomb Raider. Come to think of it, this game might actually be a better Tomb Raider title than any of those in the Survivor series. Anyway, we’ve got more Goblins to deal with now, and shooting them in the head is always a good time. Once we reach the far end, a Cyclops bursts through the wall to join the party. He is an optional kill, so we opt out of fighting him and head on up to the next level. We kick a load of Goblins off the bridge there and pick up a the firelord staff in one of the rooms. After that we cross over the bridge and climb out through another breach in the wall, picking up a couple more skill points as we go. We’re still saving up for the second level of critical hit though, so we decide not to spend them - on to the next area!

That’ll do for this entry, check back next time as we continue our quest, and hopefully find some natural light (I saw little of it while putting this together).
And as always, thank you for reading. If you’d like to support the blog, you can do so over on Patreon, or by subscribing and sharing!